
Where Is Here: New Home
All performances techniques I learned during 1 week crunch time in August 2021 in Unity 3D
Hey guys!!
In the month of August 2021, I tried to do a 1 week crunch to push harder of making my game.
During the crunch week I learned a lot about performances of your game. FPS is very important in your game because how bigger the number of FPS, how better the quality of your game that doesn't become laggy!
So I will show you what I have learned...
1) Occlusion Culling - Occluder Static & Occludee Static
2) Lightning & bake (no shadows in bigger maps)
3) LOD's
4) Enable GPU Instancing
5) Texture Max Size smaller with compressor quality
6) Use box, capsule OR sphere collider instead of mesh collider
1) OCCLUSION CULLING - OCCLUDER STATIC OR OCCLUDEE STATIC
Occlusion Culling is very useful to make your game not laggy AND doesn't take long to load a big scene. When you turn around, behind you will all game objects disappear. What I mean is: if the game objects are not in your view of camera in the game, it will be invisible.
Or you can use it like when you have a wall in your game and behind that wall (or door)you can make game objects invisible too. So it doesn't have to load ALL game objects if you don't have to see it yet. Or if you don't see it from behind.
The difference between Occluder static and Occludee static is that... It was hard for me to understand in the beginning so I will give you an short example:
When you have a city, in that city (buildings, fountains, benches, people) you have to use OCCLUDEE STATIC and the wall around the city is OCCLUDER STATIC.
Why? Because OCCLUDEE STATIC is used what's behind the wall that you can't see! So it doesn't have to load all game objects and when the wall is broken, the game objects will appear in the game but not all of them! Just in your game camera view!
The wall has to be OCCLUDER STATIC because it will go invisible behind you BUT it will be there in your view and helps with the OCCLUDEE STATIC. You can't make all game objects OCCLUDEE without a OCCLUDER STATIC in front of it!
Don't forget box collider has to be there too. I had some problems with this and I needed a box collider to some game objects.
And you need to BAKE your Occlusion Culling, when you are finished selecting ALL game objects OCCLUDER or OCCLUDEE STATIC!!

Example image where is Static options is and this game object is a building in a city. (only Occludee Static is enabled behind the walls of the city. So if the doors and walls are closed and you are out of the city. The buildings will be invisible.
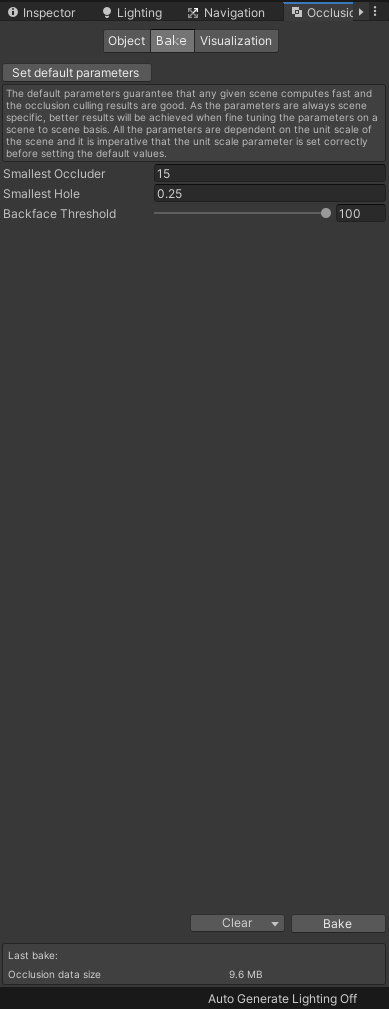
Example image of baking Occlusion Culling. (This is the standaard option and my Occlusion data size is 9.6 MB). Bake your Occlusion Culling so the next step of seeing the picture below will work in your game too.
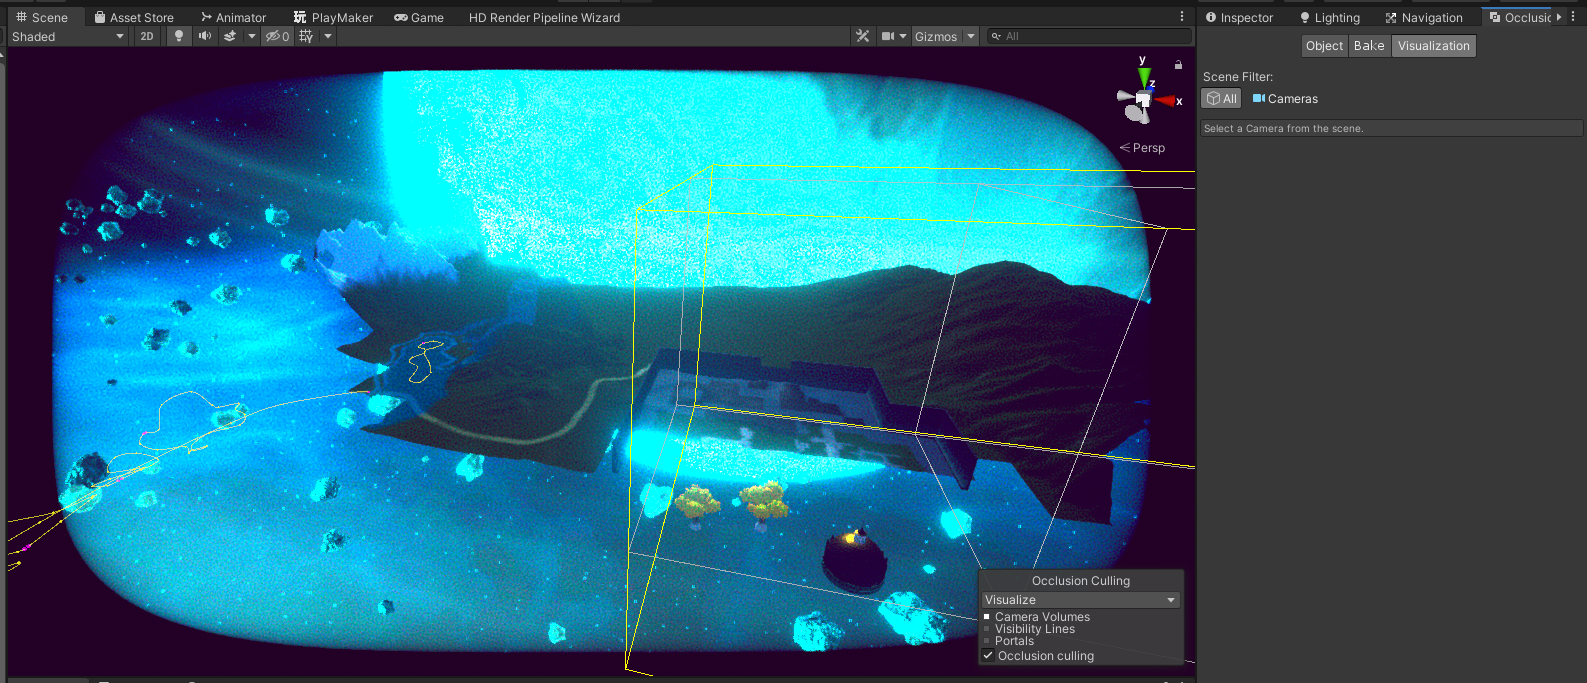
Example image of camera view looking forward and behind, left and right are some game objects invisible because it's not in view in the camera view. You have to bake your occlusion culling to your main camera .
2) LIGHTNING AND BAKE (WITH NO SHADOW IN BIGGER MAPS)
I use lightning not that much in bigger maps such as "Home Location". Because when you add lights without shadow, it doesn't change that much. And many shadows is very bad for your game because it will become laggy.
I heard if you bake the lighting in your game with soft shadows, it won't be that bad! But I didn't practice bake lightning so I use some "real time lights". It looks realistic to me but to many of it with shadow will make your FPS low and your game will be super laggy.
You need to bake your lightning so it will make lightning maps. It's very important to do that because I build a scene "Green Forest" and the fog, light effects and textures were a mess or it was gone! So you need to make a lightmapping, so bake your lights!
Use less "hard shadows" because it's a very powerful tool and it need to calculate a lot and that's why is laggy because of it.
WARNING!
I have a 2019.4 Unity Editor so I can't say for other versions BUT if you make lightmapping for your game. You can't save it on your other drivers instead on C.
This lightmapping will take a lot of "Disk Space" in your C drive. So make your lightmapping as small as possible.
If you want to see where is your lightmapping saved ... Go to Preference and GI cache. There you will see how much it saves. And enable compression. I saw in the year 2016 that you could change the driver where to save it. But I can't change it.
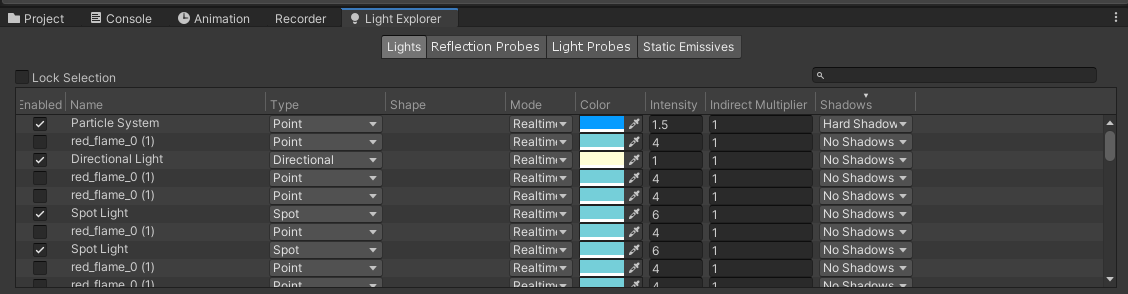
Example image of "light Explorer" (very handy to find all lights of all game objects).
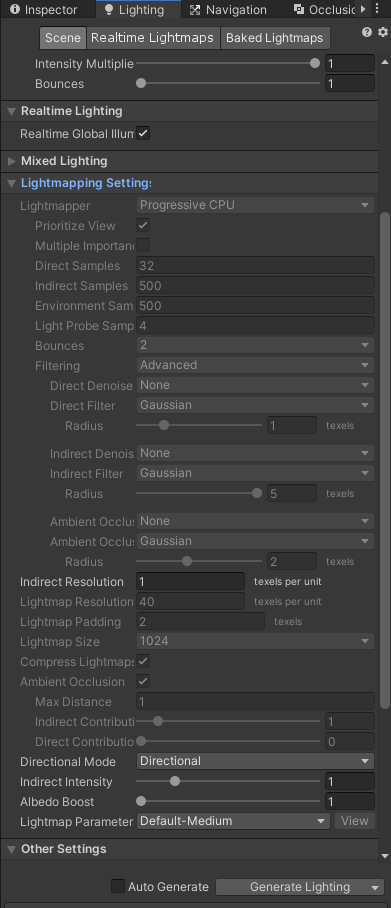
Example image of lightmapping your scene (very important to do before making a build!) IMPORTANT: Indirect Resolution needs to be a low number. If I typed 10 instead of 1, the baking of lightmap will take VERY VERY long! Make the number lower so the baking will take shorter time. It took me 5mins to bake on number 1. And I had to brighter the light (sun) realtime a little higher. From 1 to 1.5 intensity.

Example image of baked lightmaps. (my lightings in my game is only realtime lighting, so I baked ONLY realtime Lightsmaps
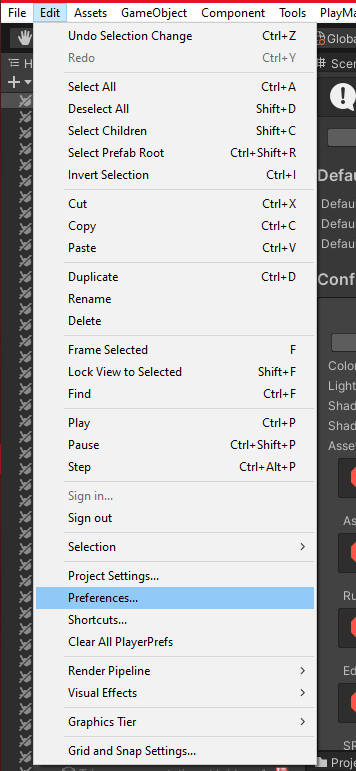
Example image for searching preference and finding GI cache.

Example image of GI Cache. The warning I was telling about. All lightmaps will be saved on C driver because I can't change it to another driver. So you need to be careful how much Cache size is because it can happen a "Disk Space out of memory". Invoiding this problem, indirect resolution has to be a lower number (for example: 1 or 0.1) ..IF lightmapping takes LONG time, it will take MORE space in your C drive.
3) LOD's
LOD's are very handy in ALL game objects. From a distance, you can make a game object disappear. When you approach it, it will appear again.
You don't have to load all game objects because it will take time to load your game. You don't need all game objects when they are very far away. And your FPS will be VERY low and super laggy.
Adding LODs as much as possible will help a lot for making your game smooth.
You can choose the distance of each game object when they need to appear in the game and when not. Very easy to use.

Example Image of LOD's for a blue tree. (The distance is showed by %, between colors there is a line and if you click on it, you will see with your camera how far it will be from that game object). IF you don't have many LOD's on a game object, don't worry ... Make 2 boxes (1 other color and 1 red ( RED means the game object will be invisible).

Example image of LOD's options. (go to "Add Component" and type LOD group and you will have this in your game object too).
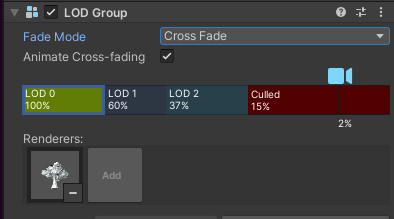
Example of image of selecting 100 % LOD 0. You can see the game object in the LOD 0. If you have different view of game object from a distance, you can make more LOD 0, LOD 1 and so on. But if you don't have it. Don't worry. Make only 1 LOD and Culled means the game object will disappear. Just DRAG your game object from Hierarchy and go to LOD Group and add to your LOD square. and you will have the same white image of your game object when selecting the LOD.
4) ENABLE GPU INSTANCING
I don't know how to explain this in a good short way. I remember this helps out when you use a lot of the same texture in your game, you should turn on "Enable GPU Instancing" so it doesn't calculate a lot of textures in the game.
More I can't explain but it is important to use if you are using lots of textures in your game. It saves your textures and doesn't load heavy. And remembers it, I think.
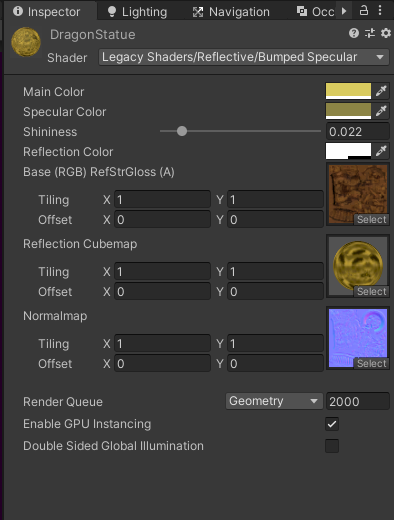
Example image of Enable GPU Instancing. (the box is enabled)
5) TEXTURE MAX SIZE SMALLER WITH COMPRESSOR QUALITY
This is a very important part of making your game smaller and not heavy to load.
When you have textures from a game object. It happens a lot that the texture "Max Size" is too big. So you need to make it smaller.
BEWARE when you make a texture smaller, the game object will look different. So while doing this, you should check how your game object looks like and if you can't make it smaller. No matter, you tried or made it a little smaller helps to make your game smaller as size and not laggy to load a big texture size.
DON'T FORGET to use "Compressor Quality" for making a smaller file in your game. So if you will build your game, it won't be big because of your compressing the texture files!
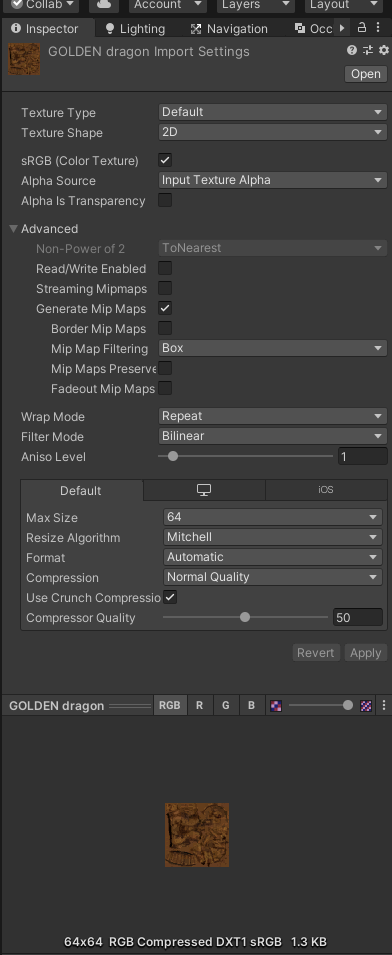
Example image of texture options
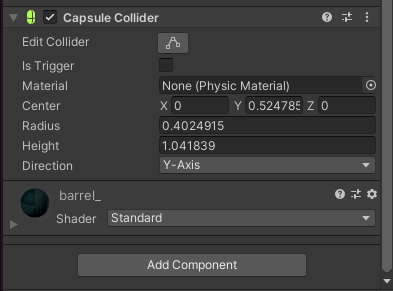
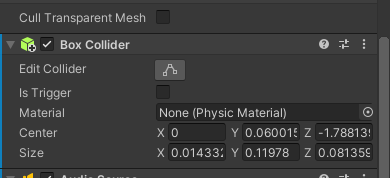
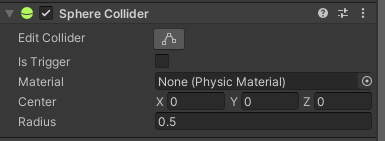
6) USE BOX, CAPSULE OR SPHERE COLLIDER INSTEAD OF MESH COLLIDER
Mesh collider is a pain in the ass. Because when I am on the scene tab and I want to move, it's getting laggy. When you want to playtest your game with so many mesh collider, it will lag a lot!
So what I did, I used box, sphere and capsule collider so that my game won't calculate all the triangles in my game and makes a simple calculation of the light bouncing on the game objects.
- Capsule Collider I used mostly on trees.
- Box Collider I used on buildings, walls, small game game objects.
- Sphere I used for characters in the game because they were wide enough.
I had a temple and buildings with so many mesh colliders and it was insane! So I unable it and added box colliders when needed and it's not laggy anymore for a long time.
That's it for performances in my game. Will I learn more about it for the next game, yes I will.
But I learned a lot of fixing my laggy game while on scene or on game tab.
And building my game with all these steps made my game smooth!
Good luck!
Comments
Log in with itch.io to leave a comment.
Very useful and well written!
Thank you!! :D I am very grateful you liked my devlog! ^^
happy to share my knowledge of what I have learned... instead google it on internet and it takes longer to search for an answer, right? :D
And now I know where to find in case I forgot, and I forget a lot! =P
You're not the only one.. Me too 😅
Too many buttons and menus! It's insane! 😱